QNAP is a company that designs great network attached storages (NAS). Unfortunately, even their NAS can crash. Mine did. Before you get to how to recover the lost data, here's my NAS and RAID spec (so that you can understand what and why I did):
- QNAP TS-410U
- RAID5
- 4 HDD (/dev/sda, /dev/sdb, /dev/sdc, /dev/sdd)
- Approximately 1.4 TB of data
- Fortunately I had the most important data already backuped somewhere else (less pressure and stresses during fixing)
And this is what happened to it:
- NAS software update (for 1 week everything was working fine)
- NAS rejected one of my HDDs (/dev/sda) due to SMART status.
- RAID5 is now in degradation mode.
- Broken HDD has been removed (not replaced!).
- NAS has been shutdown (I didn't plan to use it so I turn it off for 2 weeks - just in case).
- NAS would not boot with HDDs inside (well it would boot but it didn't get an IP address, so that I could get to it).
- NAS is not reachable at all (despite the fact that it seemed to work just fine).
- Basic system reset (3s) didn't help at all (still no network connection).
Booting without any hard drives
You won't be able to do anything, unless you manage to get online with your QNAP. If it's just a software issue (which was in my case), follow these instructions:
- Force shutdown of your NAS (press power button for 10 seconds)
- Remove all the hard drives
- Turn on your NAS by pressing power button
- Once it is ready (it beeps), perform a basic system reset
- Restart your NAS (either by performing shutdown or by disconnecting power)
- Boot it again
- You should be able to reach the following website: http://your-nas-ip-address:8080/
- Unfortunately you don't have any hard drives connected, so no data recovery yet ;)
No hard drives and no setup equals no way to recover data
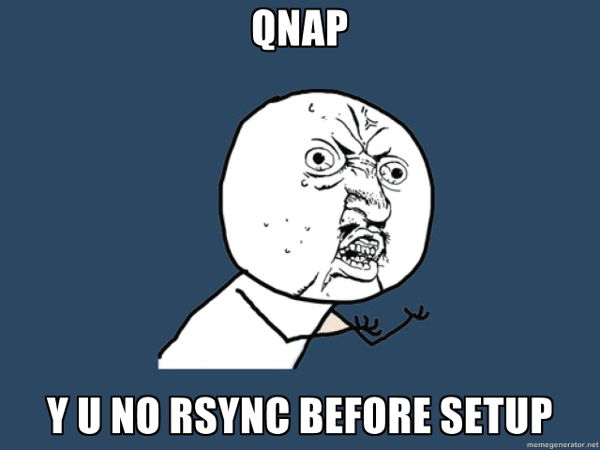
Before you attach our hard drives and restore RAID, you need to know one thing: QNAP that is not a setup with at least 1 HDD, won't provide you with any tools like scp or rsync. You will be able to examine your HDDs (there's mdadm luckily), but you won't transfer your data via LAN. All network tools are only available once you perform a full setup. Also keep in mind, that you should perform a whole new installation with your RAID hard drives unplugged (just in case).
Spare HDD to the rescue
Make your NAS available via SSH with all the tools you need.
To do this, you will have to have one spare hard drive (any SATA HDD will be ok). Now:
- Turn off your NAS.
- Plug in your HDD.
- Make sure your RAID HDDs are unplugged.
- Power on your NAS.
- Once it boots, go to admin page and perform a quick setup.
- Now you should be able to connect to it via SSH (ssh admin@your-nas-ip) user: admin, password: admin
- Once you connect, check if you have the following commands available: rsync, scp, mdadm
Reassembling RAID5 and mounting it to recover data
I used the first HDD slot for a temporary "rescue" HDD (/dev/sda). So it won't be included when I will reassemble the rest of HDDs.
Before you assemble anything, you need to check if there's valid RAID data on each of the remaining HDDs:
# You will have also
mdadm --examine /dev/sdb3
mdadm --examine /dev/sdc3
mdadm --examine /dev/sdd3
For each of them, you should see something like that:
/dev/sdc3:
          Magic : a92b4efc
        Version : 00.90.00
           UUID : 0fcde09f:5258ded4:4c22c8ef:89a53221
  Creation Time : Sat Mar  9 21:13:27 2013
     Raid Level : raid5
  Used Dev Size : 1951945600 (1861.52 GiB 1998.79 GB)
     Array Size : 5855836800 (5584.56 GiB 5996.38 GB)
   Raid Devices : 4
  Total Devices : 3
Preferred Minor : 1

    Update Time : Sun Feb  1 13:32:54 2015
          State : active
 Active Devices : 3
Working Devices : 3
 Failed Devices : 0
  Spare Devices : 0
       Checksum : fb959cff - correct
         Events : 0.1608150

         Layout : left-symmetric
     Chunk Size : 64K

      Number   Major   Minor   RaidDevice State
this     2       8       35        2      active sync   /dev/sdc3

   0     0       0        0        0      removed
   1     1       8       19        1      active sync   /dev/sdb3
   2     2       8       35        2      active sync   /dev/sdc3
   3     3       8       51        3      active sync   /dev/sdd3
Now reassembling:
# Use /dev/mdNR that is not taken already
mdadm --assemble /dev/md1 /dev/sdb3 /dev/sdc3 /dev/sdd3
After executing this command, your RAID should be assembled and ready to mount:
mkdir /share/QSAVE
mount -t ext4 /dev/md1 /share/QSAVE
If everything went ok, you can see your data, when you'll:
cd /share/QSAVE
ls
Local backup
If you used a decent "rescue" HDD, you can now use it as a backup hard drive for all of your NAS data (as long as it is big enough):
mkdir /share/HDA_DATA/backup
rsync -rv /share/QSAVE/ /share/HDA_DATA/backup/
Remote backup
You can also backup your NAS remotely:
mkdir ./qnap_backup
rsync -rv --exclude=".*" admin@your-nas-ip:/share/QSAVE/ ./qnap_backup
Also keep in mind, that even when you have RAID1, RAID5, RAID10 and so on, it is still worth having an external backup of all of your data.