When you'll setup your Gitlab instance using Synology DMS 6.0 UI, despite the fact that you've provided all the Gmail credentials, you will notice that it does not send any emails. You probably end up with a message similar to this one when:
EOFError: end of file reached
It may sound a bit enigmatic, but in general it means that your Gmail setup is wrong. Unfortunately you cannot change it using the UI. Fixing this requires a SSH connection.
Warning: I’m not responsible for any damages or injury, including but not limited to special or consequential damages, that result from your use of this instruction.
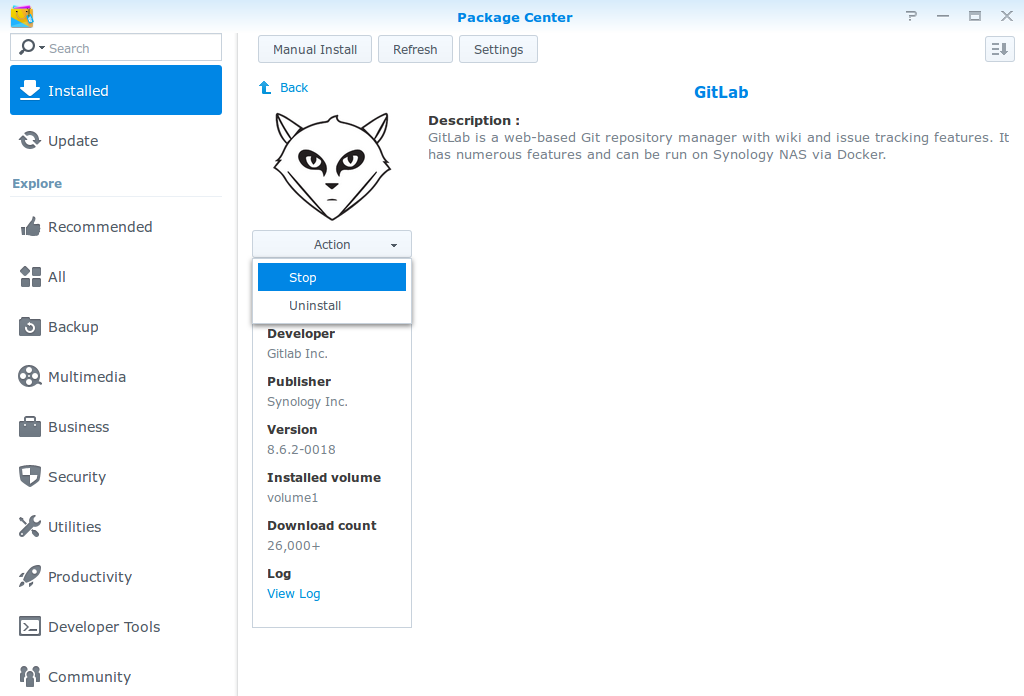
Stop your Gitlab using DMS UI
First, you need to stop your Gitlab instance via DMS UI:
- So to Package Manager
- Select Gitlab
- Select "Actions"
- Click on the "Stop" button
Change your synology_gitlab.config via SSH
This one is a bit harder. Here are the th ings you need to know before you start:
- How to log in via SSH into admin account
- How to install (if you don't have) vim (or any other console text editor)
- How to navigate in a Linux shell
So, if you know this things, you are ready to go!
- Log in into your Synology server via SSH as admin user
- Become a root (sudo su + password)
- Go to /usr/syno/etc/packages/Docker (cd /usr/syno/etc/packages/Docker)
- Edit synology_gitlab.config (vim synology_gitlab.config)
- Replace or add given config options into the env_variables section
- Save the file
Those are the options you need to set:
{
  "key":"SMTP_ENABLED",
  "value":"true"
},
{
  "key":"SMTP_DOMAIN",
  "value":"www.gmail.com"
},
{
  "key":"SMTP_HOST",
  "value":"smtp.gmail.com"
},
{
  "key":"SMTP_PORT",
  "value":"587"
},
{
  "key":"SMTP_USER",
  "value":"your user name"
},
{
  "key":"SMTP_PASS",
  "value":"your password"
},
{
  "key":"SMTP_OPENSSL_VERIFY_MODE",
  "value":"none"
},
{
  "key":"SMTP_AUTHENTICATION",
  "value":"login"
},
{
  "key":"SMTP_STARTTLS",
  "value":"true"
}
The whole file should look more or less like that:
{
  "cap_add":[

  ],
  "cap_drop":[

  ],
  "cmd":"",
  "cpu_priority":0,
  "ddsm_bind_share":"",
  "devices":[

  ],
  "enable_publish_all_ports":false,
  "enabled":true,
  "env_variables":[
    {
      "key":"GITLAB_HOST",
      "value":"gitdomain"
    },
    {
      "key":"GITLAB_PORT",
      "value":"port"
    },
    {
      "key":"GITLAB_SSH_PORT",
      "value":"port"
    },
    {
      "key":"GITLAB_EMAIL",
      "value":"email"
    },
    {
      "key":"DB_TYPE",
      "value":"mysql"
    },
    {
      "key":"DB_HOST",
      "value":"172.17.0.1"
    },
    {
      "key":"DB_NAME",
      "value":"gitlab"
    },
    {
      "key":"DB_USER",
      "value":"gitlab"
    },
    {
      "key":"DB_PASS",
      "value":"password"
    },
    {
      "key":"GITLAB_SECRETS_DB_KEY_BASE",
      "value":"secret"
    },
    {
      "key":"SMTP_ENABLED",
      "value":"true"
    },
    {
      "key":"SMTP_DOMAIN",
      "value":"www.gmail.com"
    },
    {
      "key":"SMTP_HOST",
      "value":"smtp.gmail.com"
    },
    {
      "key":"SMTP_PORT",
      "value":"587"
    },
    {
      "key":"SMTP_USER",
      "value":"email"
    },
    {
      "key":"SMTP_PASS",
      "value":"password"
    },
    {
      "key":"SMTP_OPENSSL_VERIFY_MODE",
      "value":"none"
    },
    {
      "key":"SMTP_AUTHENTICATION",
      "value":"login"
    },
    {
      "key":"SMTP_STARTTLS",
      "value":"true"
    }
  ],
  "exporting":false,
  "id":"id",
  "image":"sameersbn/gitlab:8.6.2",
  "is_ddsm":false,
  "is_package":true,
  "links":[
    {
      "alias":"redisio",
      "link_container":"synology_gitlab_redis"
    }
  ],
  "memory_limit":0,
  "name":"synology_gitlab",
  "pin":false,
  "port_bindings":[
    {
      "container_port":80,
      "host_port": port,
      "type":"tcp"
    },
    {
      "container_port":22,
      "host_port": port,
      "type":"tcp"
    }
  ],
  "privileged":false,
  "shortcut":{
    "enable_shortcut":false,
    "enable_status_page":false,
    "enable_web_page":false,
    "web_page_url":""
  },
  "volume_bindings":[
    {
      "host_volume_file":"/docker/gitlab",
      "mount_point":"/home/git/data",
      "type":"rw"
    }
  ]
}
Start your Gitlab using DMS UI
Procedure is exactly the same as stopping except the last step: just click on "Run" button instead of "Stop".
Retry all failed tasks in the Gitlab Sidekiq panel
- Log in to your Gitlab admin account
- Go to the "Admin area" (right top corner icon) - /admin
- Click on "Background jobs" (left bottom corner) - /admin/background_jobs
- Go to "Retries"
- If you have any, click on "Retry all" to reexecute all the failed tasks

And that's all! If you didn't make any mistakes, your Gitlab emails should be sent via provided Gmail account.