Category: Hardware

HTC Magic CyanogenMod 4.2 to 5.0.8 Daily Driver White update

I've decided to do major upgrade from CyanogenMod 4.2 to 5.08 Daily Driver on my HTC Magic phone.

Thanks to Edek Łomiarz - I've managed to survive and create this tutorial :)

If you want to update your Cyan you will net old radio na SPL, here you have mine:

HTC Magic od Orange (32A):
wersja opr 1.6
Baseband 62.52S.20.18U_3.22.20.17
Kernel 2.6.29.6-cyanogenmod
Mod version: CyanogenMod-4.2.15.1
Compliation: DRC92
Nandroid: 2.2v

So if you have software like presented above and you have already Cyanogen on your phone - you're free to go.

How to update Cyan?
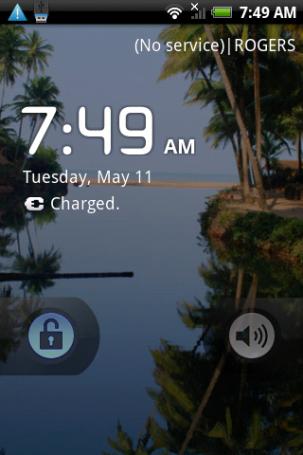
Download latest Cyanogen mode from XDA: http://forum.xda-developers.com/showthread.php?t=673394. There are two versions - black and white so choose the one you like:
cyanogen_mod2cyanogen_mod

[Update] Stable Cyanogen mode has been released - installation looks the same.

Before updating:

  • Charge your battery
  • Download mod from XDA
  • Copy mod into root dir on your phone SD card
  • Restart phone with pressed home button to load Nandroid

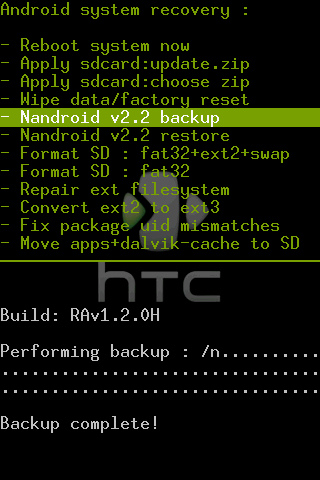
After Nandroid boots, you will see:
nandroid

  • Select Nandroid v2.2 backup
  • Confirm by pressing home button (and wait until backup is over)
  • Select Wipe data/factory reset (resetting phone and OS)
  • Select Apply sdcard:choose.zip and select rom (CM5.0.7t7-32a-w)
  • Wait, wait, wait
  • Reboot system now
  • Wait approximately 10-15 minutes while Cyan is loading for the first time

Thats all. Cyanoged mod is really fast and fancy. He has got a really nice gallery with 3D effects like those in Picasa.

Any problems? You still have your backup so you can restore it.

Remember - you are performing update at your own risk!

How to clean a laptop keyboard

Recently, I've decided to clean my laptop keyboard and make a small tutorial for those interested in this topic.

First of all, check on ebay whether you can buy extra keys or not. If not - don't clean it like this. You don't want to break anything right? I've never broke any of keys but better be cautious.

Let's start'. I'll be cleaning by Toshiba A200-1H, however most of low-profile keyboards have same working mechanism.

Some important rules:

  • Do not be brutal - it is delicate stuff
  • No water or any other fluids!
  • No electricity
  • If you're cleaning notebook - remove the battery
  • Disconnect all external devices
  • Clean up the workplace (probably some kind of desktop ;) )
  • Prepare the camera to be able to take a picture (it's not so easy to remember right keys order)
  • Prepare small flat bladed screwdriver and some cotton buds

All steps are illustrated below.

First of all - take a picture of your keyboard. It will help you after cleaning. You would like to attach them in the same order, right? :)

Removing the keys is the hardest part. Each key has two "teeth" which bind them with the rest of the keyboard. They are (in most cases) located at the top of each key. It shouldn’t be hard to locate them. Slightly undermine top part of the key. You should hear characteristic "click". After top part "jumped" out - do the same with bottom key part.

Try not to break key mechanism because you will be forced to use ebay ;)

Repeat procedure for all the keys. Bigger keys (space, backspace and enter) have metal "frame" that holds them. However, this frame is not a problem.

When all the keys are out, you should place them for a few hours in water with a little bit of  dish-washing liquid. It will dissolve dirt and make them look like new.

Meanwhile we can clean up "naked" keyboard with vacuum cleaner. Rest remove using cotton buds.

After cleaning keys - take them out of water, put them on a tea-towel and let them get dry.

Assembling keys is really easy. First attach bottom part of key and press it until you hear "click". After that, do the same thing with upper key part.

You clean it up at your own risk!


Copyright © 2025 Closer to Code

Theme by Anders NorenUp ↑